Composting
Stuff (like food waste) decomposes and rots - it’s nature!
Although this is a process from nature that is perfectly effective left to its own devices, we can create a space for and benefit from the results of composting.
Unless you have a greenhouse, these winter months can be a sedentary time for home gardeners. We may have some indoor plants to care for, but this time of year we may begin itching to get back outside and toil in the soil. Thankfully, composting is a year round activity! Though it doesn’t take much time or work to maintain, focusing on our composting now can help our garden thrive during the growing season. Why is composting such a great thing to do?
1. It diverts biodegradable products from the landfill which can reduce the amount of methane produced at our landfills.
2. Compost provides important nutrients to our seedlings and plants, so we can avoid using chemical fertilizers.
3. Compost enhances water retention in soil (oh so important here in Colorado) and improves the quality of our soil. For more detailed information about the benefits of compost, visit this site
Preparing Your Compost Site
Woohoo! Now that we’re getting excited about the benefits and importance of composting, let’s jump right in! First, we need to evaluate our space and figure out which composting method is best for us.

What if you live in an apartment and the only outdoor space you have is a tiny balcony? If you have very little space to compost, you can use two buckets or bins with lids. The reason why you need two is so that you can be actively adding to one bin while the second bin is finishing decomposing. Keep these bins in your kitchen or on your patio and ensure the lids fit tight. Head’s up that oftentimes this method of composting can produce soil with a higher acidic content than what’s best for plants. So, avoid adding lots of compost directly to your plant pots. You can amend your finished compost by mixing it with your garden soil or by blending in a strong base (like baking soda) before introducing it to your plants.
Do you have a bit more space than an apartment? Maybe you live in a condo or house with a small yard. Check out tumbler composting - this is the method that I use! You can build or purchase this style bin that is easy to turn and keep your compost well mixed. As with our previous method, it is best to have two bins so that one can finish decomposing while you’re adding fresh peels, stems, and trimmings to the other one. This system keeps your bins off of the ground, so you can place the tumblers on pretty much any surface.
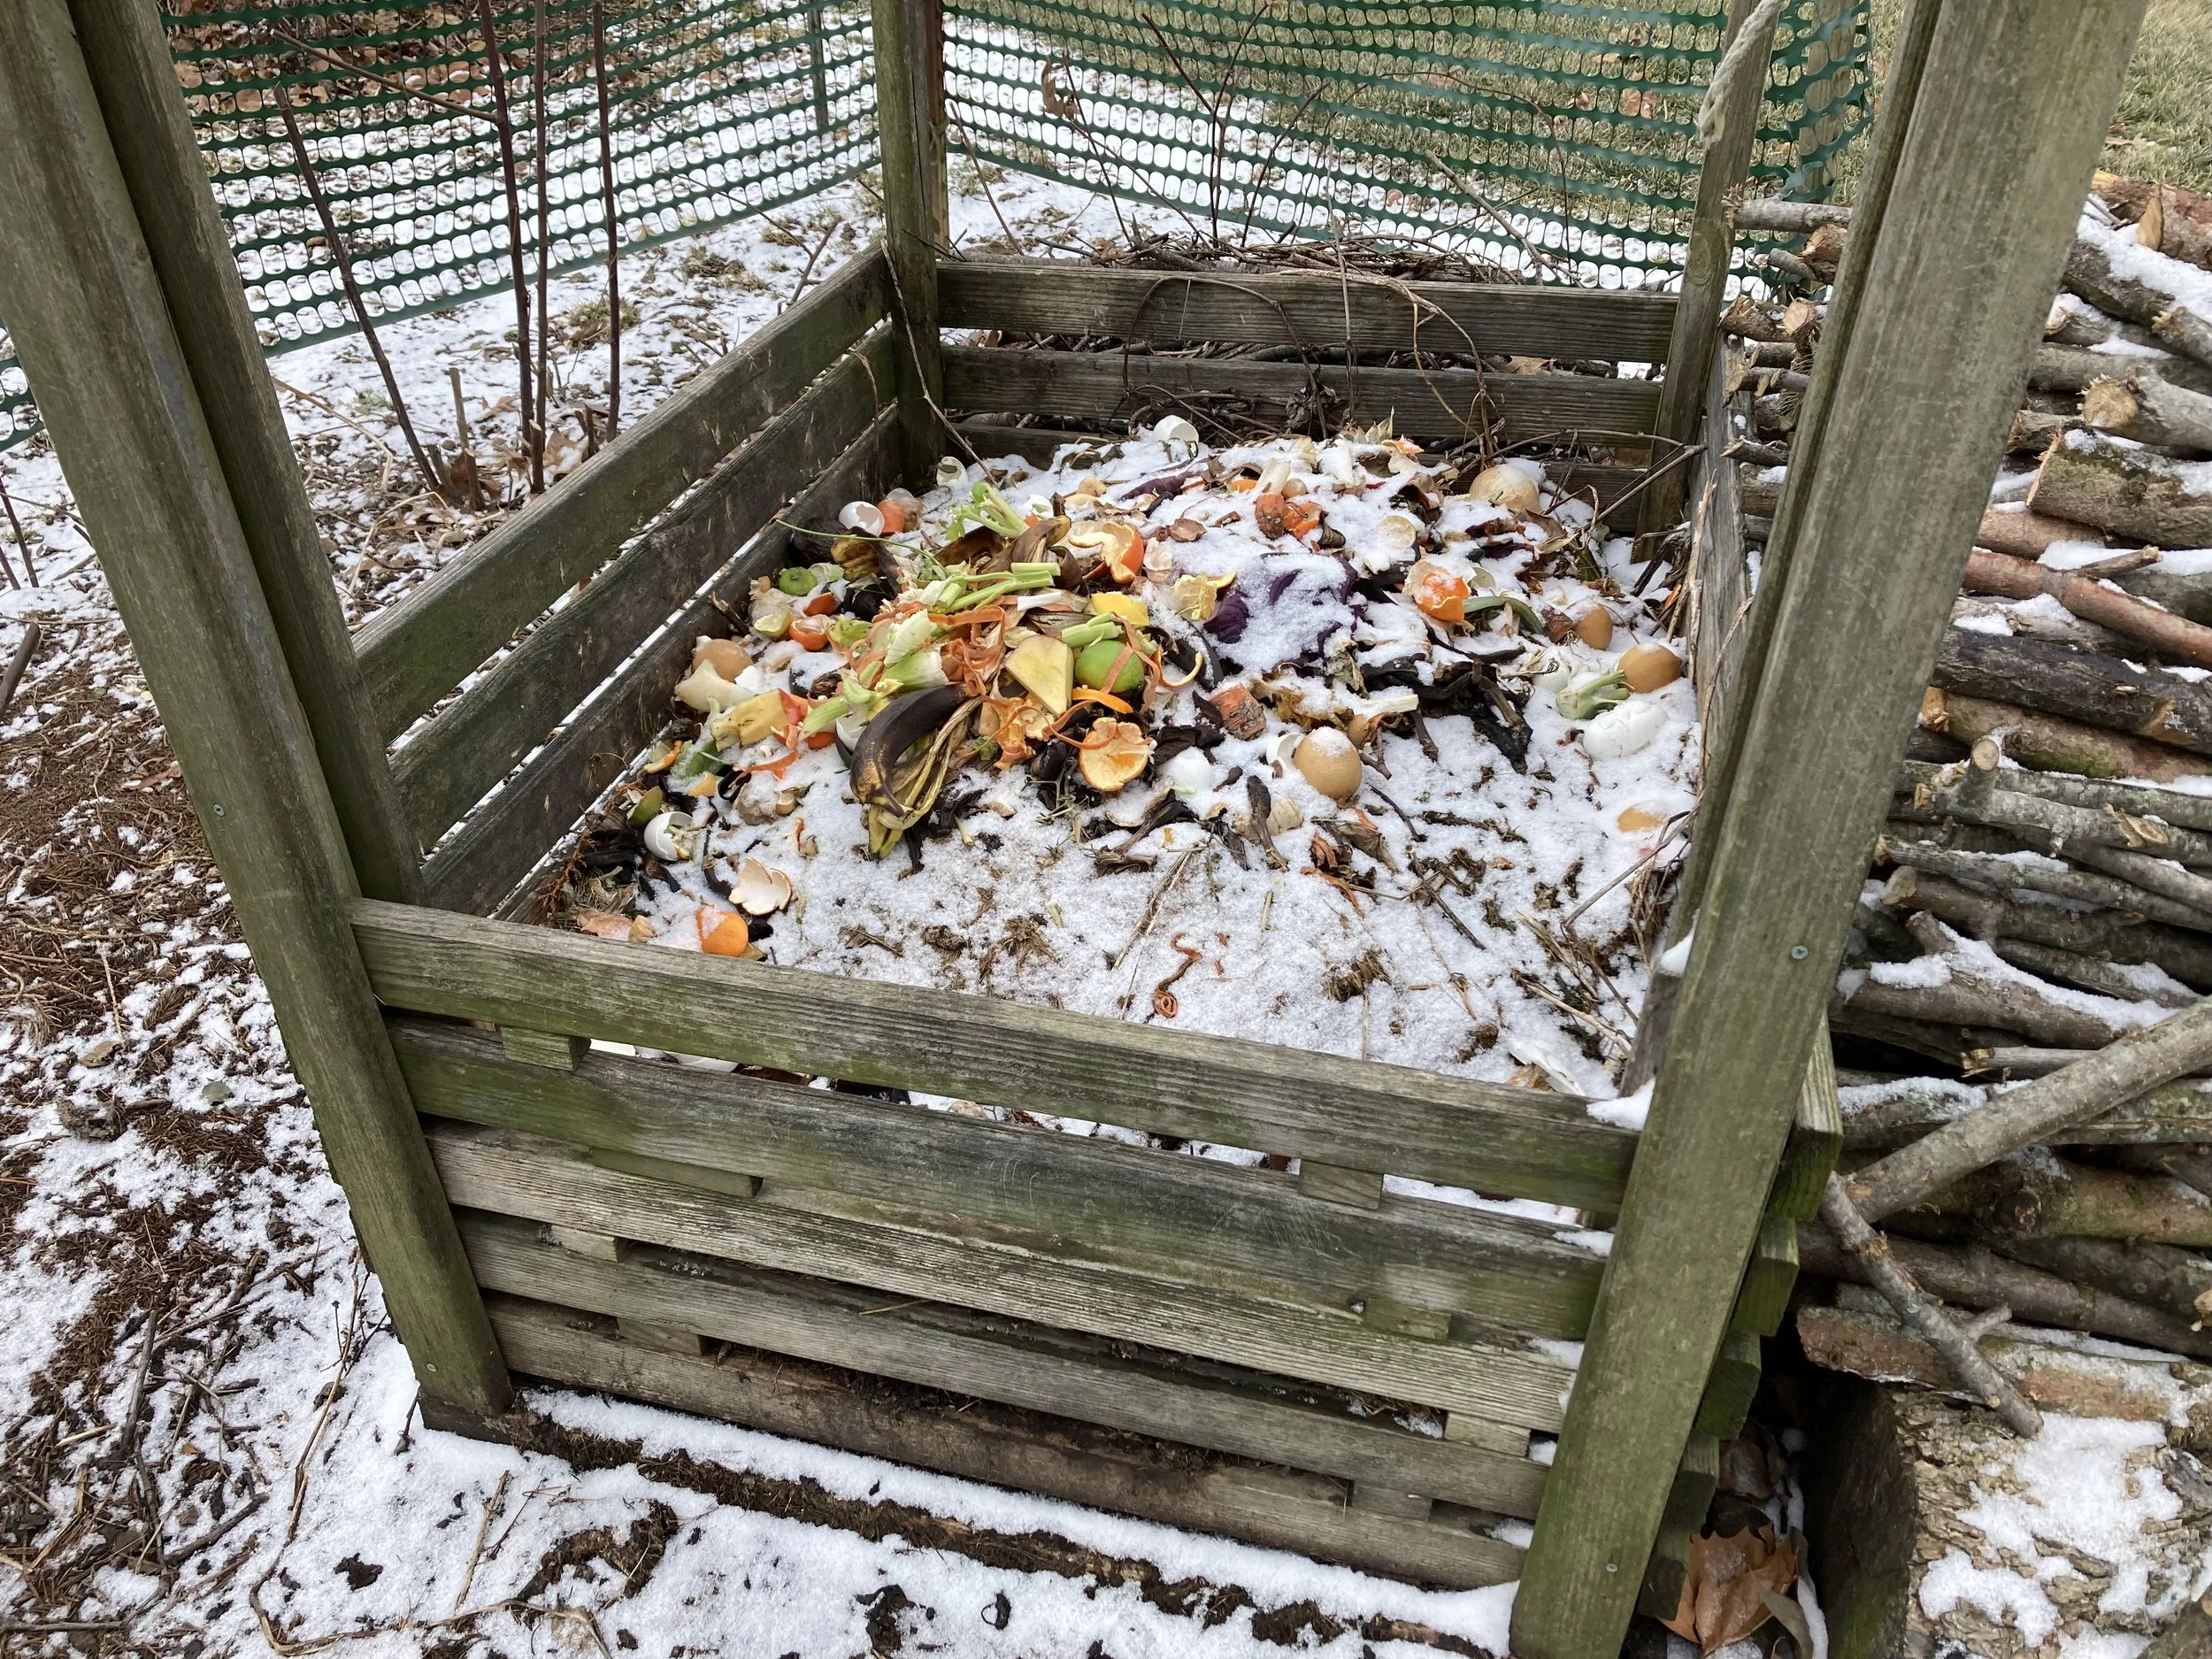
If you have an even larger yard, you may want to look into open air composting. In this method you can create a type of bay or cage that typically has one open side and an open top. You can make this bay as large or as small as you’d like, but I’d recommend building it in a corner or spot in your yard that is tucked away from the main entertaining area. The compost shouldn’t produce much of an aroma, but it will attract more bugs and possibly some critters. This method requires the most work to turn the compost and ensure even decomposition. You will need to break out the shovel about once a month in an established compost bay to turn your decomposing material and manage the temperature.
Another option if you have a larger garden plot is to bury your compost. You can dig a hole, add your compost trimmings in, then bury the hole and wait for everything to decompose. It will take longer for all of your compost to finish decomposing because there is no aeration in the buried hole. Once it is finished decomposing, you can leave it there or you can re-dig a hole and add more compost. This method requires that all the compost be added to the hole at the same time and then buried, so you’ll need to find a “waiting room” for your food trimmings. If you have a garden plot in the yard, you could dig these holes and bury the compost in the fall then plant your seeds in the humus filled soil in the spring.
Aaaand… vermiculture. Vermiculture is the process of using worms to assist us in breaking down our compost. Worms are great because they can eat and process more of our waste and speed up our composting. Red Wriggler worms are oftentimes used - they love the environment of a compost pile and they can reproduce quickly. Within vermiculture, there are different set-ups we can choose. There are bins specifically tailored to creating the happiest environment possible for the worms or we can dig a trench, add our compost, and add our worms. The exact method we choose will be determined by the space we have available and the amount of money we want to spend up front. At the end of the day, worms like to eat organic waste, live in a moderately moist environment, and not get too hot or too cold - thankfully they aren’t very picky!
Lastly, if you still want to compost but don’t want to maintain any of these compost methods, you can look into your city’s compost program.
What Items Do We Compost?
Materials that came from the earth and experienced minimal processing.
Does that seem too simple? Oftentimes this is the place where amateur composters can become confused, intimidated, and maybe even overwhelmed. Its really quite simple. Food scraps, paper, and yard waste will decompose, so toss it all together and let nature do its thing.
With these biodegradable items, some are more nitrogen dense and others are more carbon dense. We want a mixture of these materials in our compost bin. If we begin to notice a strong, unpleasant odor from our compost, that is a sign that we need to add more carbon.

Common Items to Avoid Placing in Your Compost
materials like glass, ceramic, metal, or plastic
food scraps that will attract critters (racoons, rats, or bears)
Meat and Fish Scraps
Dairy
Fats and Oils
A note: If you have a piece of bread that was brushed with a bit of butter or vegetables cooked in oil, it’ll be fine. We’re talking about full servings or entire packages here. A bit here and there shouldn’t be a problem, especially if you compost in a closed bin.
Plants that have been treated with pesticides, herbicides, or fungicides
Wood that has been pressure treated, painted, stained, or varnished
Black Walnut Tree Debris
Charcoal Ash
Pet Waste
Heavily Coated, Printed, or Waxy Paper
‘Commercially Compostable Only’
Check for this label on some disposable items - these require the controlled environment of an industrial composting facility in order to properly decompose.
Maintaining Your Compost
Alrighty! We’ve decided on our system of composting and identified which items we can and cannot add, now it’s time to chat about how we’ll maintain our compost pile. Thankfully compost is all about biodegradable items decomposing as nature intends it. This process will happen with or without our help! However, there are conditions that will speed up this process. Part of benefits of composting is utilizing the finished compost in our gardens to provide plants with a boost of nutrition. So the quicker everything decomposes, the better!
Temperature
As your compost is broken down by various bacteria and organisms, they create heat due to their metabolic activity. These organisms prefer warm temperatures, but not piping hot. The heat will be centered in the middle of our pile and will gradually get cooler as we move to the outside. The optimal compost pile temperature range is between 90F and 140F. Many bacteria die at temperatures above 140F. (Do you see a correlation to Protein Internal Temperature Cooking Requirements?). So how do we prevent our pile from getting too hot? We can turn the pile to release some of the heat and mix the cooler outside of the pile towards the warmer middle.
Moisture
This is a Goldilocks situation - we don’t want our pile too wet or too dry. If our pile is oversaturated with water, the bacteria and microorganisms will be starved for oxygen. If the pile is too dry, the microorganisms won’t be able to do their job either. The optimal moisture content for our compost pile is between 40 - 60%. So, what does this feel and look like? If our compost is slimy and smells bad, it’s too wet. We can add dried leaves, a sprinkle of sawdust, or shredded paper to help soak up the excess moisture. If we grab a handful of our compost pile, squeeze it, and it doesn’t pack together at all, then our pile is too dry. We can add water to our pile, mix or turn it, and then feel it again. We may need to continue watering and checking the pile a few times before it becomes moist enough. Following the watering, we can find kitchen scraps that contain a higher moisture content to add to our compost pile - tomatoes, rotten watermelon, cucumber ends, etc. When we live in a dry climate like Colorado, watering our compost pile once to twice a week can be a major help in maintaining a happy compost.
Aeration
The mighty microorganisms that break down our compost need oxygen in order to do their job. This is why it is highly encouraged to mix or turn our compost piles. The frequency required is dependent on the size and density of our pile or bin, but once per week is a good starting point. We can always experiment with turning our piles more often and analyzing if that helps our materials decompose quicker. Another method is by introducing worms. As worms burrow through our compost pile, they create pathways through which air and oxygen can travel. If we introduce worms to our compost, we can reduce the amount of turning that we need to do.
Achieving a Finished Pile
Most compost systems will have two phases. The first is when we are actively adding our food trimmings, yard debris, and biodegradable materials. These will begin decomposing, but the process takes time. If we constantly continue adding new materials to the same pile, we will always have a mixture of finished compost and partially decomposed material. The second phase is when no new material is added and the existing pile is allowed to completely decompose all of the material. This is the finishing phase.
We can separate our Active Phase from our Finishing Phase by using two (or more) different piles or bins. Once the first pile is ‘full’, we stop adding new material to it and begin adding material to the second pile. That first pile is monitored to ensure proper temperature, hydration, and aeration until the entire pile is dark and crumbly with no original material visible.
Another option is to use a bin with mesh separated sections. The top section is where new material is added in even portions of carbon and nitrogen dense items. As these are broken down, they will fall through a layer of mesh (like a sieve) to another layer where they can continue to decompose. By the time our compost falls through all of the layers to the bottom of the bin, it is finished decomposing and ready to be used.
Don’t get overwhelmed!
When you go down the rabbit hole of researching compost, there is A LOT of information. This can make composting feel much more intimidating than it actually is. Organic material rots. Bacteria and microorganisms break down biodegradable materials into simple compounds that are easier for nature to use. Long before humans existed this process was happening. It will continue long after us. Nature is doing the important work here, you’re just planning a special spot for it to happen. Organic material is meant to decompose, it’ll happen, there’s no need for you to stress or micro-manage it into happening.